Refreshingly Sophisticated: The Joy of Real Mint Ice Cream at Home
Imagine a cool, invigorating treat that embodies both rustic charm and culinary elegance. Forget the artificially dyed, overly sweet concoctions often found in freezers; we're talking about the sublime experience of real mint ice cream, made right in your own kitchen. This isn't just a dessert; it's a sensory journey that transforms simple garden-fresh mint into a masterpiece of flavor and texture. If you've ever yearned for a refreshing escape from the ordinary, prepare to fall in love with homemade mint ice cream.
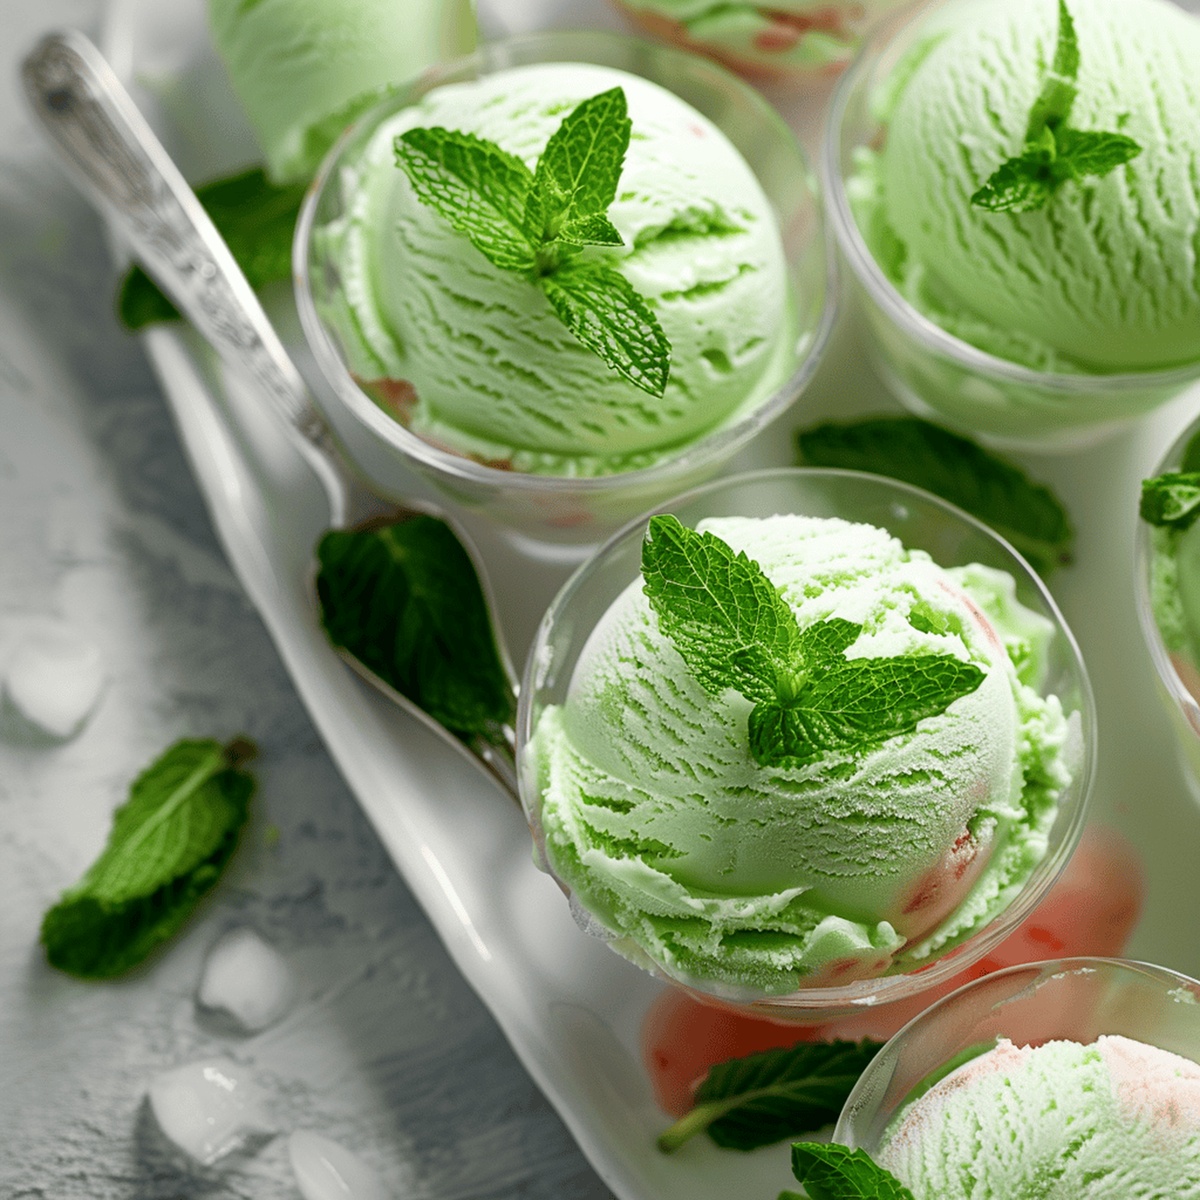
The Allure of Real Mint Ice Cream: A Sensory Escape
The moment you taste genuine mint ice cream, you'll understand its undeniable appeal. It whispers cool sophistication through its naturally delicate hue and invigorating aroma. Unlike its artificial counterparts, which often assault the senses with a harsh, sometimes toothpaste-like flavor, real mint ice cream offers a gentle, nuanced essence. Delicate mint leaves infuse this classic dessert with a natural, garden-fresh essence that dances across your palate, creating a truly unique and memorable sensation.
Smooth, rich cream provides a luxurious backdrop for the herb’s crisp, bright notes, reimagining an ordinary treat into a profound sensory experience. Each spoonful promises a refreshing escape, blending creamy richness with botanical brightness. The subtle mint flavor offers a gentle, sophisticated touch that feels both familiar and exciting, leaving you captivated by its remarkable balance of coolness and creaminess. It’s a sophisticated yet approachable dessert, bridging a comforting, homemade feel with an elegant culinary finish.
Unveiling the Magic: Why Homemade Mint Ice Cream Reigns Supreme
While the idea of making homemade ice cream might seem intimidating at first, the truth is it’s surprisingly approachable and incredibly rewarding. The journey of crafting your own mint ice cream allows you unparalleled control over every ingredient, ensuring a treat free from artificial colors, flavors, and excessive sugars. This control is precisely what elevates homemade versions far above most store-bought options.
When you choose to make it yourself, you dictate the intensity of the mint flavor, the richness of the cream base, and the quality of any additions, such as decadent chocolate. Using fresh mint leaves—rather than extracts—is the game-changer. It imbues the ice cream with a vibrant, complex herbaceousness that simply cannot be replicated by synthetic flavorings. This natural infusion results in a cleaner, more authentic taste that truly embodies the essence of mint. Beyond the classic chocolate chip variety, homemade mint ice cream opens up a world of creative possibilities. For a deeper dive into perfecting your technique and exploring diverse variations, explore resources like Mastering Fresh Mint Ice Cream: Your Guide to Creamy, Garden-Fresh Flavor.
Crafting Your Culinary Masterpiece: A Step-by-Step Journey to Perfect Mint Ice Cream
Creating a smooth, creamy dessert with vibrant mint flavor and satisfying chocolate bits is easier than you think. Let's walk through the methodical steps to build a luscious custard base, infuse it with real mint, and finish it with quality chocolate for that nostalgic treat you remember.
Essential Ingredients for Exceptional Flavor:
- 2 cups heavy cream: Always use cold heavy cream, straight from the fridge, for the best results in your custard base.
- 1 cup whole milk: Contributes to the creaminess and texture.
- ¾ cup granulated sugar: Sweetens and helps prevent ice crystals.
- 6 large egg yolks: Room temperature eggs incorporate more smoothly into the custard, creating a richer, silkier texture.
- 1 cup packed fresh mint leaves: About one large bunch. Wash and pat them dry thoroughly to ensure maximum flavor infusion without diluting the cream.
- 1 tsp pure vanilla extract: A touch of vanilla enhances the overall flavor profile.
- ¼ tsp fine sea salt: Balances the sweetness and amplifies the mint.
- 4 oz semisweet chocolate bars: Chopped into small, irregular chunks. I prefer a quality bar over pre-packaged chips for better texture and melt in the ice cream.
The Custard Base: Infusing & Tempering
- Infuse the Cream: Combine the heavy cream, whole milk, and packed fresh mint leaves in a medium saucepan. Heat the mixture over medium heat until it just begins to steam and small bubbles form around the edges (approximately 5-7 minutes). It's crucial not to let it boil, as this can scorch the dairy and diminish the mint's delicate flavor.
- Steep for Flavor: Remove the saucepan from heat, cover it, and let the mint steep for at least 30 minutes. This allows the mint's essential oils to thoroughly infuse the cream, imparting its signature freshness. For an even more intense mint flavor, you can steep for up to an hour.
- Strain the Mint: Strain the mint-infused cream through a fine-mesh sieve into a clean bowl, pressing firmly on the mint leaves to extract every last drop of flavorful liquid. Discard the spent mint leaves.
- Prepare the Eggs: In a separate medium bowl, whisk together the egg yolks and granulated sugar until the mixture is pale yellow and slightly thickened, usually about 2 minutes of vigorous whisking. This process introduces air and lightens the mixture.
- Temper the Eggs: Slowly pour about ½ cup of the warm mint cream into the egg mixture while whisking constantly. This crucial step, known as tempering, gently raises the temperature of the egg yolks, preventing them from scrambling when combined with the hot cream. Gradually add another ½ cup of the warm cream, continuing to whisk.
- Combine & Cook the Custard: Pour the tempered egg mixture back into the saucepan with the remaining mint-infused cream. Cook the custard over medium-low heat, stirring constantly with a wooden spoon or heat-resistant spatula. Continue stirring until the custard thickens enough to coat the back of the spoon, meaning a clear path remains when you run your finger across it. A thermometer should read approximately 170°F (77°C). This usually takes 8-10 minutes. Do not let the custard boil, as it can curdle.
- Finish the Custard: Immediately remove the custard from heat and stir in the pure vanilla extract and fine sea salt.
- Ensure Smoothness: Pour the custard through a fine-mesh sieve into a clean bowl. This step ensures an incredibly smooth final texture, removing any tiny bits of cooked egg or stray mint particles.
- Chill Thoroughly: Place plastic wrap directly on the surface of the custard to prevent a "skin" from forming as it cools. Refrigerate the custard until it is completely chilled, which will take at least 4 hours, or ideally, overnight. Proper chilling is vital for achieving the best texture during churning.
Churning and Finishing Touches:
- Churn the Custard: Churn the thoroughly chilled custard in your ice cream maker according to the manufacturer’s instructions. This typically takes about 20-25 minutes, until it reaches the consistency of soft-serve ice cream.
- Prepare Chocolate: While the ice cream churns, chop the semisweet chocolate bars into small, irregular chunks. Using a bar and chopping it yourself provides varying sizes and a superior melt compared to standard chocolate chips, which often contain stabilizers to prevent melting. For a truly decadent experience, consider exploring The Ultimate Homemade Fresh Mint Chocolate Chip Ice Cream Recipe.
- Add Inclusions: During the last few minutes of churning, add the chopped chocolate chunks directly into the ice cream maker. Let it churn for another minute or two to evenly distribute the chocolate.
- Final Freeze: Transfer the soft ice cream to an airtight container and freeze for at least 2-4 hours, or until firm, before serving. This allows the ice cream to harden to the perfect scoopable consistency.
Tips for Elevating Your Homemade Mint Ice Cream
To truly master your homemade mint ice cream, consider these additional insights and tips:
- Mint Varieties Matter: While spearmint (common garden mint) offers a milder, sweeter flavor, peppermint provides a bolder, cooler sensation. Experiment with both or a combination to find your preferred intensity. Avoid wild mints unless you are certain of their edibility and flavor profile.
- Natural Color: Be aware that pure fresh mint will not yield a vibrant green ice cream like commercial varieties. The natural color will be a very pale green or even slightly off-white. If a greener hue is desired, you can add a tiny amount of natural food coloring (like spinach powder, though this can subtly alter taste) or embrace the natural, elegant appearance as a sign of its authenticity.
- Optimal Steeping Time: While 30 minutes is a good starting point, if you desire a more pronounced mint flavor, you can steep the mint leaves in the warm cream for up to an hour, or even refrigerate the infused cream (with the mint still in it) overnight before straining and proceeding.
- Serving Suggestions: Homemade mint ice cream is divine on its own, but it also pairs wonderfully with warm fudge sauce, chocolate brownies, or a sprinkle of extra chocolate shavings. For a refreshing twist, serve it alongside fresh berries or a delicate lemon shortbread.
- Preventing Icy Texture: Ensure your custard is thoroughly chilled before churning. An ice cream maker bowl that is frozen solid (usually 24 hours in advance) is also critical. Too much liquid, not enough fat (heavy cream), or under-churning can lead to an icy consistency.
- Storage: Store your homemade ice cream in an airtight container in the coldest part of your freezer. To prevent freezer burn, you can press a piece of plastic wrap directly onto the surface of the ice cream before sealing the container. Homemade ice cream is best enjoyed within 1-2 weeks.
There's an undeniable joy in savoring a dessert crafted with care, especially one as refreshing and sophisticated as real mint ice cream. By following these steps and incorporating these tips, you'll unlock a world of vibrant, garden-fresh flavor that far surpasses any store-bought alternative. So, gather your fresh mint, dust off your ice cream maker—it's about to become your best friend this season—and prepare to delight your senses with a truly extraordinary homemade treat. The cool, bright essence of mint, embraced in creamy perfection, awaits.
